Tuesday, February 28, 2012

I Dream of Ice Cream! by Taylor

This weekend the hubs and I went to visit one of my very best friends, Katie, and her husband Gabe, in the Raleigh area.  Katie and I both love to craft and we spent the majority of the weekend bargain hunting and decorating!  It was wonderful!

I have been wanting Katie to teach me how to use her Silhouette, so when we spotted some adorable ice cream cups for $2 a piece, we knew we had to find a way to embellish them!  We used the Silhouette to write an adjective that describes ice cream on each one.  It easily cut the words out of the vinyl and the adhesive on the back made it simple to adhere each word.  Later on that evening we ate brownies and ice cream out of them- can you say delish?!  Check out Katie's take on our ice cream dishes here!


Saturday, February 25, 2012

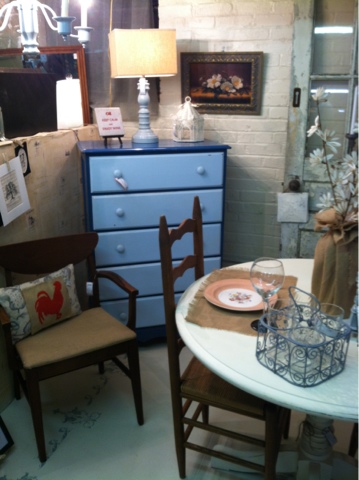
New arrivals at The Cotton Cottage!

Tons of new items at my and my mom's booth down town Belmont at Piccolo Antique Mall! We put new items in every week from antiques,home decor to beauty items!

134 North Main Street
Belmont, NC 28012

If you are in town make sure to stop by and visit all of the great booths we have to offer upstairs and downstairs. Trust me this could turn in to an all day shopping event for you!

Monday, February 20, 2012

Burlap Banner by Taylor

Our bedroom has needed a little pick-me-up for a while now, but it seems that the upstairs of our house has been the last to get decorated.  I decided to make a burlap banner for above our bed to make our space a little more cozy and cute.  
I started by buying several yards of burlap fabric (I could have gotten away with 1/3 of a yard since I was only writing a five letter word, but I wanted more for other projects).  I also bought green fabric paint, some letter stencils and some round sponge brushes. 
Then, I made myself a triangular template out of printer paper.  I cut it out and laid it on my burlap fabric to cut out each triangle. NOTE:  I should have reflected this in my template, but I didn't- whoops!  I made sure to cut out a flap at the top of the triangle so I could fold it over and sew ribbon through it (see pics of cut-out triangles below).
 
Once the triangles were cut out, I painted the letters on with stencils.
 
Then, I took some ivory ribbon and sewed it to each triangle by laying it underneath the flap.  Be sure to use a stitch that reinforces, like a zigzag.  When you are finished, you may want to but some anti-fraying solution on the edges of your triangles if you are using a fabric like burlap that unravels easily.
 
Finally, I hung the banner above our bed.  I love how it drapes across the old window!  
Why did I choose the word "Faith"?  Because it reminds us as we wake up and as we go to bed that faith is the single most important thing in our lives.  :)


Tuesday, February 7, 2012

DIY Mercury Glass by Hilary

I have seen many tutorials lately on DIY mercury glass votives. Needless to say I tried my hand at it. This is my first attempt (I am sure I'll do better next time!). All I need to say is make sure not to get it on the outside!
Must do:
One light coat of krylon looking glass followed by one mist of white vinegar water.
Let dry and add another light coat of paint.
Dry over night in a drying rack and your ready to light great smelling candles!

Monday, February 6, 2012

Moss Covered Wreath by Taylor

Being a new home owner, I was not aware of the crucial problem that occurs after Christmas- the "It's Not Spring but It's Not Christmas and What the Heck do I Decorate For" problem. Fellow decorators, I know you can relate. I took down the holiday decor, cleaned the house and then realized how EMPTY our house felt after a month and a half of coziness. Since NC has been unseasonably warm this winter, I decided to go ahead and welcome Spring in a subtle way. I found some pics of moss covered wreaths online and got to work making my own. All I needed was a strip of burlap, a foam wreath form, hot glue, moss, and protective floral spray.
Not pictured: floral spray, and I only ended up needing one bag of moss:)

First, I hot glued the moss to the wreath form. I did the top layer first, then the sides. 

 
Then, I sprayed it with protective floral spray so as to prevent the moss from absorbing moisture and/or coming unglued.
Finally, I tied the burlap strip into a bow and voila!!! I was done! I may add to it later on, but for now I like the simplicity of my sweet little wreath, don't you?